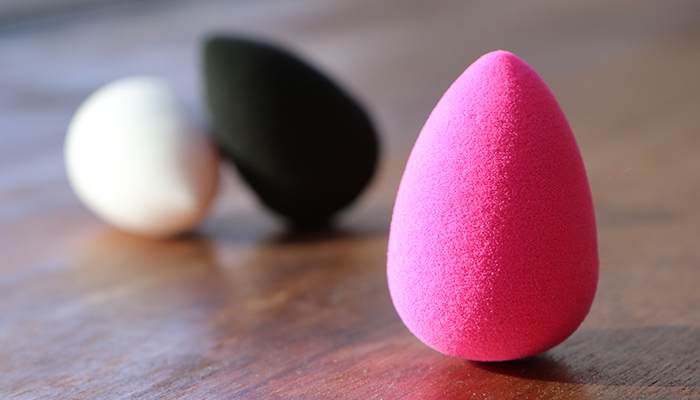
Beauty blenders are a simply magical invention. Base makeup can end up being patchy or streaky when you pat it down using your fingers. Makeup artist Rea Ann Silva invented the beauty blender to help makeup fans all around the world. When you use a moist beauty blender to apply your foundation, tinted moisturizer, or cream blush, you get a seamless application.
As many products are being smeared on the blender, it's bound to get a little dirty. Moreover, blender sponges are so absorbent that they attract a lot of bacteria, causing your face to break out if the blender isn't cleaned properly. In this article, we'll talk about how to clean a beauty blender so that you get flawless make up every day without pesky skin problems.
A Comprehensive Guide to Cleaning a Beauty Blender
If you want flawless makeup, you need to know how to clean your beauty blender properly. There are three steps to ensuring a squeaky clean blender and they're all super easy. Let's dive in!
1. Basic cleaning
You should clean your beauty blender every day or at least once a week. If your blender is relatively stain-free, follow this basic cleaning process to make your blender as good as new.
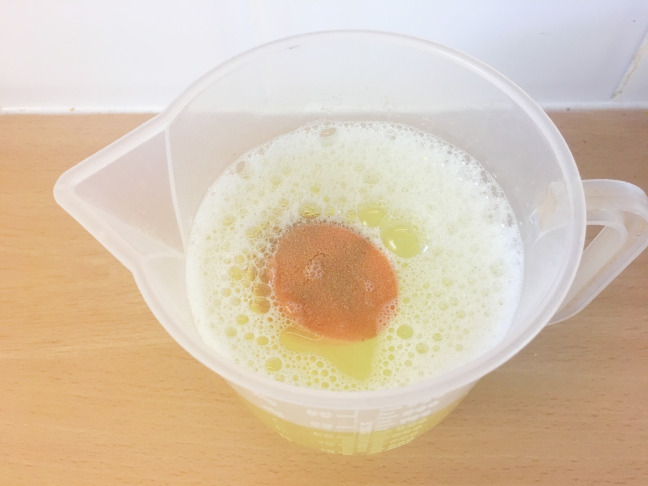
- Prepare a bowl of warm, soapy water
Pour lukewarm water into a small bowl and add gentle shampoo or face cleanser. Avoid dishwashing soap or other harsh detergents as that could irritate your skin. Typically, any cleansing product that you use for your face is a good option.
- Soak the blender
Think about the amount of makeup beauty blenders get soaked in on a daily basis: a quick dunk is often insufficient. If you want to know how to clean a beauty blender inside out, you must understand the importance of letting the blender soak in all the warm, soapy water for at least 30 minutes. Ensure that the dish has enough water to completely submerge the sponge.
- Massage some cleanser for a spotless blender
Spritz your beauty blender with some blender cleanser or a similar cleaning agent on (or even a mild soap bar). Gently massage the cleaning agent into the blender, using your thumb pads to get the makeup stains out. If you want to know how to clean a beauty blender without damaging it, stick to massaging with your fingers rather than using a brush or other abrasive objects.
- Rinse the blender
Hold the blender under warm running water to rinse the blender. Make sure that you squeeze it until no soap suds are present. If the cleanser isn't rinsed out, it could harden the sponge and make application difficult for you.
2. Deep cleaning a beauty blender
Deep clean your beauty blender only when it's necessary. A deep cleaning may be in order if you use your blender several times a day and haven't done the basic cleaning in a couple of weeks.
- Wet the blender properly
Hold the blender under running lukewarm water or soak it in a dish of warm water. You don't need to prepare soapy water at this stage for deep cleaning. Let the blender soak up all the water and expand to its full size.
- Dab solid or liquid cleanser
Rub a specially formulated blender cleanser (solid or liquid) or mild baby shampoo on your blender. Instead of using your thumb pads to take out the stains, roll the blender between your palms to give it a thorough massage. Note that this process should be more vigorous compared to the basic cleansing routine. Ensure that the message is thorough enough to bring out the soaked products to the surface. However, be careful that the process doesn't damage the sponge or change its shape.
- Rinse and scrub under water
Next, rinse your blender under running warm water while continuing to scrub it. Place the blender on your palm and use the fingers of your other hand to massage out the stains, absorbed makeup, and the cleansers from the blender.
- Ensure that it's completely clean
Continue rinsing the blender until the water is completely clear. After that, wrap the blender in a paper towel and soak the excess moisture. Let it air dry in a warm and dry place while only using it when it's completely free of moisture.
3. Microwave sterilization
Beauty blenders collect bacteria on the go if they aren't cleaned properly and this manifests in acne breakouts on your face. Want to know how to clean beauty blenders so they're completely bacteria free? Simply pop it in a microwave once a month. Here are some instructions to follow.
- Put the blender in a bowl of water
Fill a microwave-safe bowl with 1 inch of water and place the blender in it. Never microwave a dry blender as it will most definitely harden up and catch fire.
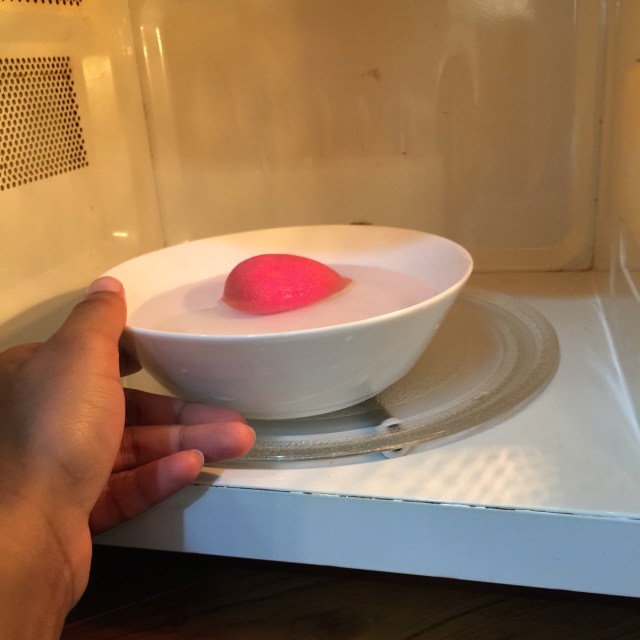
- Microwave for 30 seconds
Microwave the uncovered bowl with the blender in it for 30 seconds on high. The blender will expand and you also see some smoke. This is normal. However, if the blender expands beyond its full size and emits heavy, dense smoke, stop the microwave immediately.
- Let it sit
Let the blender sit in the bowl as the process makes the water and the blender very hot. Remember that this short burst of heat only kills the bacteria in the blender. You may still have to follow the regular cleaning or deep cleaning process to take out the stains.
How Often Should You Clean Your Beauty Blender?
Your blender absorbs makeup products, dead skin cells, and any other products you spray in the air, for example, hair spray or perfume. This inevitably means that your blender becomes a breeding ground for bacteria if not cleaned properly on a regular basis.
Typically, you should clean your blender every day to prevent acne breakouts from a bacteria-ridden blender. However, if you're short on time, ensure that you clean your blender at least once a week and sterilize it once a month. Moreover, it's recommended that you replace your blender every three months to keep your makeup application and skin flawless.
The Wrap
Beauty blenders are a great way to ensure your makeup application is seamless. However, a stained and saturated blender can hamper your application process, and the bacteria build-up can cause skin problems in the long term. It's important that you have set a cleaning schedule for your blender. Remember to clean it thoroughly using specially formulated cleansers or baby shampoo until it's free of all the absorbed products.